Importing the starter content model into your own Contentful spaces
Once you've forked the Next.js + Contentful Blog Starter to your GitHub account, and have cloned it to your local machine using git or the GitHub CLI, you're ready to learn how to use the Contentful CLI to import the provided content model into your Contentful space.
Install dependencies
In a terminal window, navigate to the project directory and install dependencies with npm.
cd nextjs-contentful-blog-starter
npm install
Set your environment variables
At the root of the project, create a new .env.local file. Add the following environment variable names to the file:
NEXT_PUBLIC_CONTENTFUL_SPACE_ID=
NEXT_PUBLIC_CONTENTFUL_ACCESS_TOKEN=
Using example content
If you'd like to view some example content in your development environment without installing the Contentful CLI to get a feel for how it works, you can use the provided credentials in env.local.example which will connect your code to the example space provided by Contentful.
Using your own Contentful account
To get started with your own Contentful space, sign up for free.
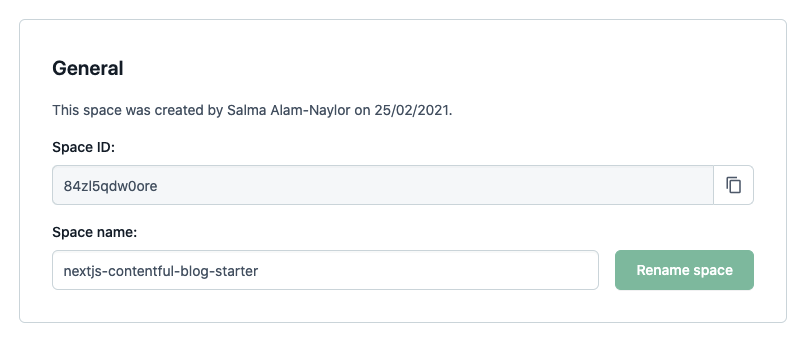
Create a new space inside your Contentful account. Go to Settings > General Settings, and make a note of your space ID.
Generate a Content Delivery API access token for your Contentful space.
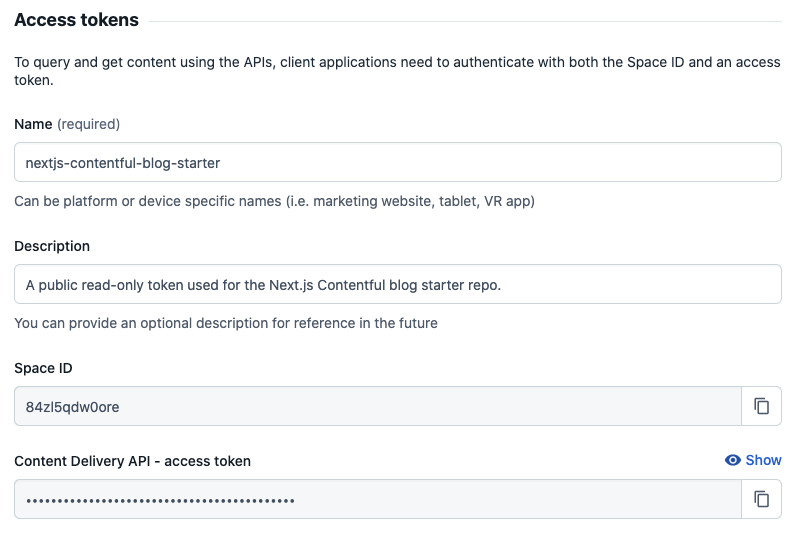
Add your space ID and access token to your .env.local file.
To get you up and running quickly on your own version of the application, you can use the Contentful CLI to import the content model and the example content from the starter into your own Contentful space — without touching the Contentful UI!
Install the Contentful CLI
Using homebrew:
brew install contentful-cliUsing npm:
npm install -g contentful-cliUsing yarn:
yarn global add contentful-cliAuthenticate with the CLI
Run contentful login in your terminal and follow the instructions in your browser.
Import the content model only
The following command in your terminal, ensuring you switch out SPACE_ID for your new space ID.
cd nextjs-contentful-blog-starter/setup

contentful space import --space-id SPACE_ID --content-file content-model.json
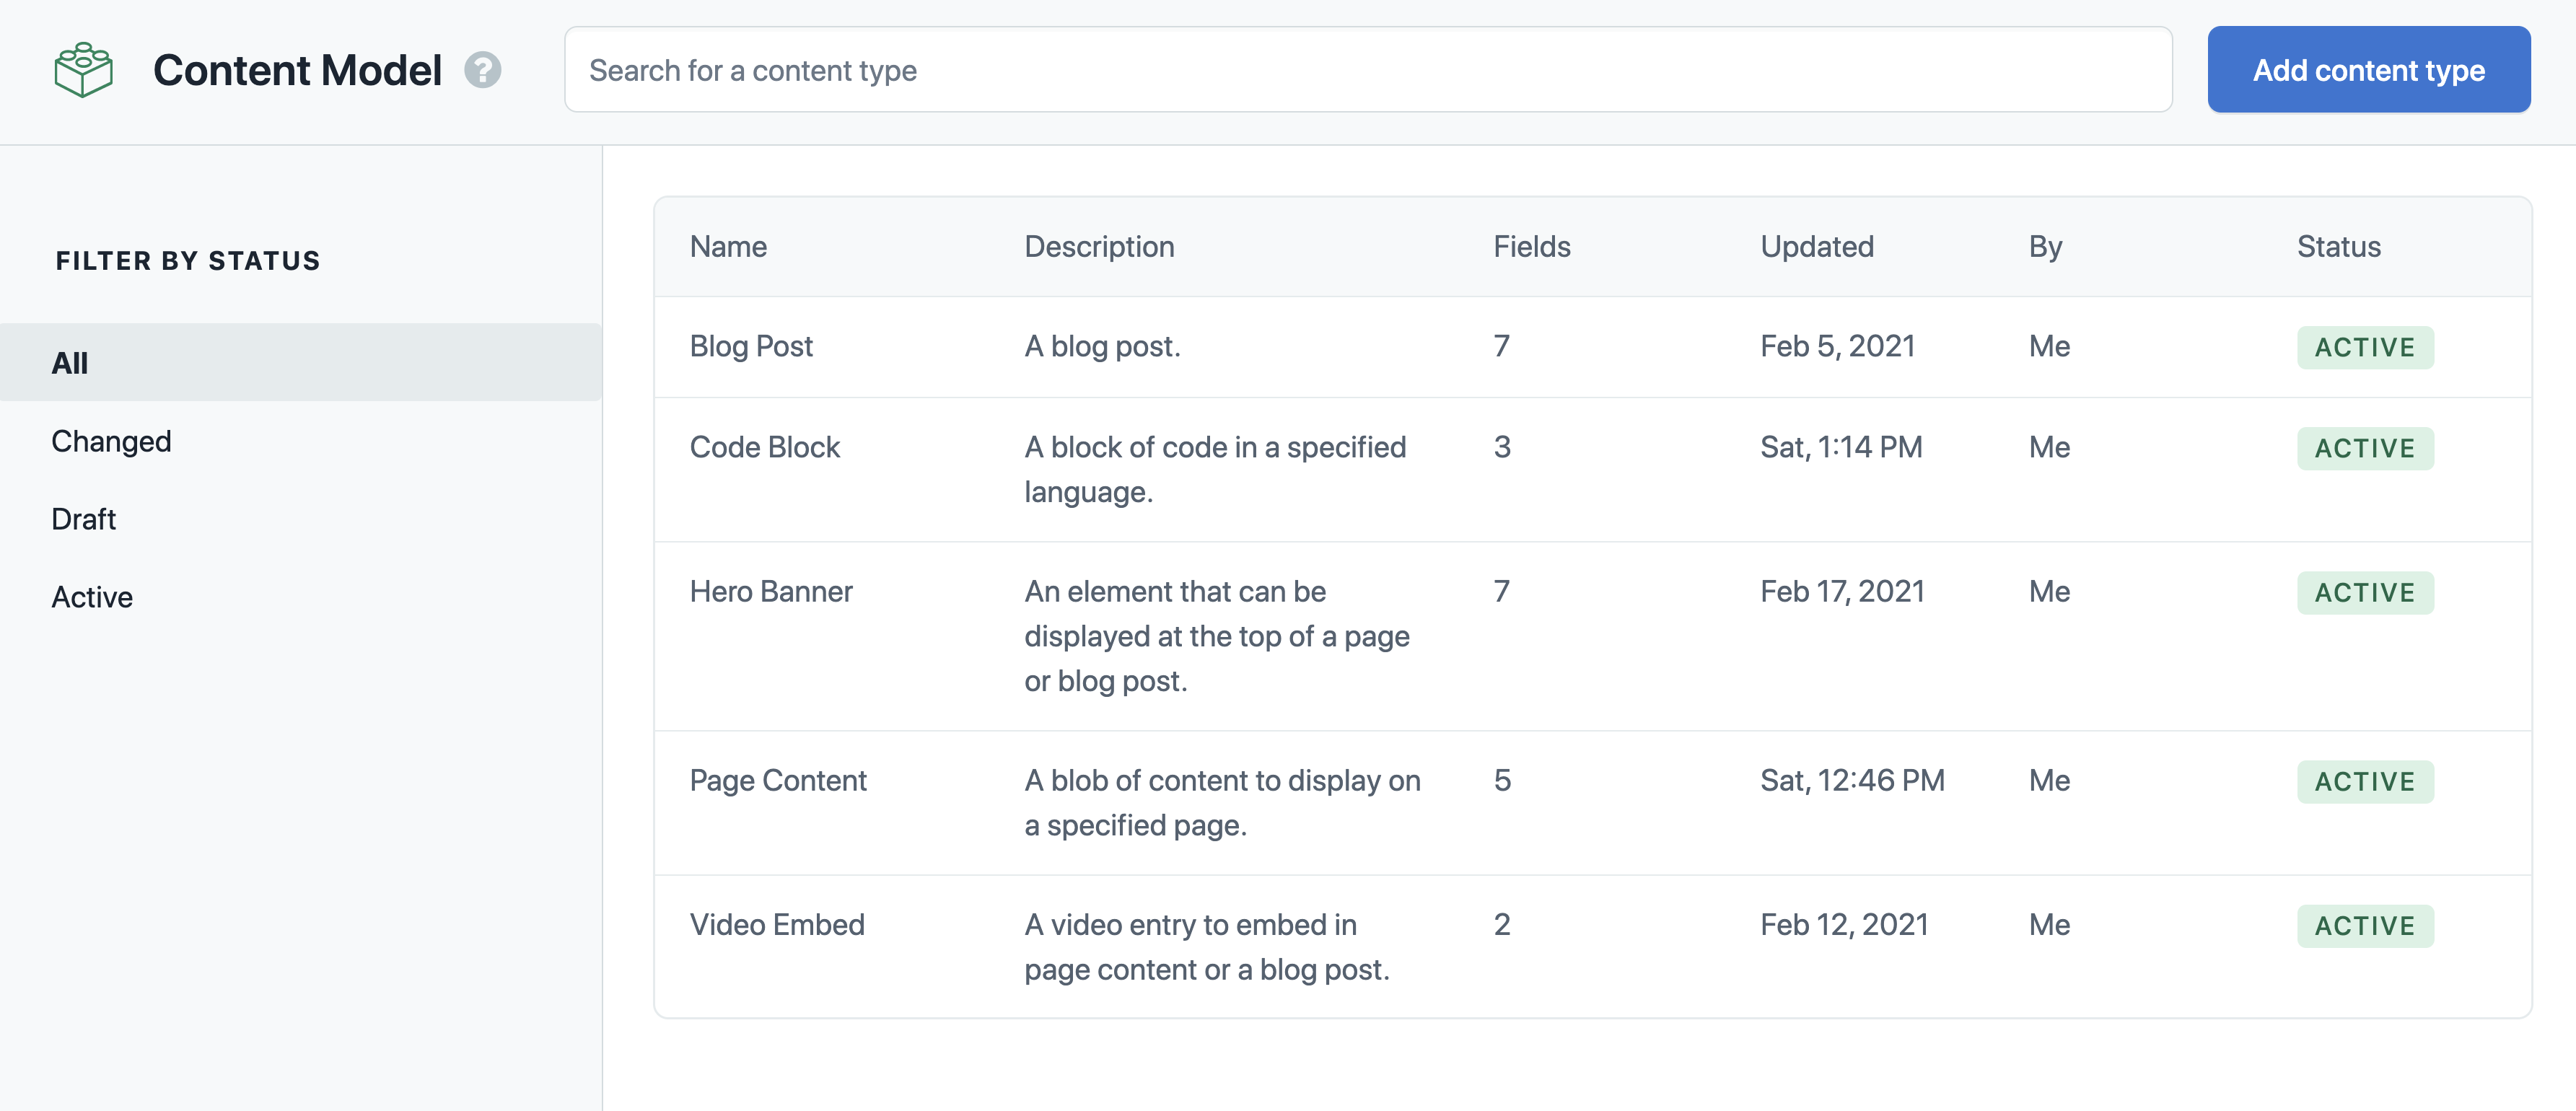
Now, refresh Contentful in your browser, navigate to the content model tab, and you'll find the content types have been imported into your space.
Import the content model and example content
The following command in your terminal, ensuring you switch out SPACE_ID for your new space ID.
cd nextjs-contentful-blog-starter/setup

contentful space import --space-id SPACE_ID --content-file content-plus-content-model.json
Refresh Contentful in your browser, navigate to the content model tab, and you'll find the content types have been imported into your space.
Navigate to the project directory in a terminal window and run:
npm run start